Living Room Makeover
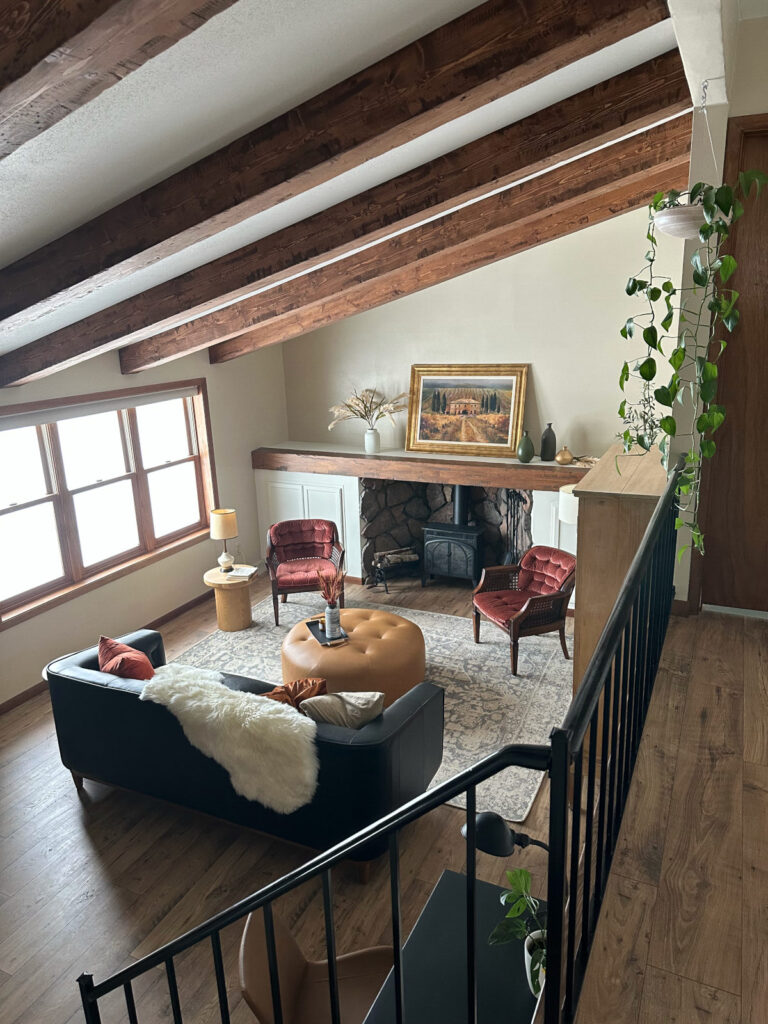
This living room was outdated, dirty, and boring when we originally bought the lakehouse. I saw its potential and transformed it into a beautiful space full of charm with the help of Article Furniture. When I saw this space I knew I wanted to accentuate the vaulted ceilings and add a focal point to the room. This would be the first space people would see when they entered the front door, so I wanted it to be stunning.

This post may contain affiliate links or sponsored content. For full disclosures and practices, please visit my policy page.
Table of Contents
- A Quick Before and After
- Removal and Prep
- Ceiling Makeover
- New Flooring Install
- Fireplace Build
- Fixing the Front Door
- The Completed Living Room!
Before and After

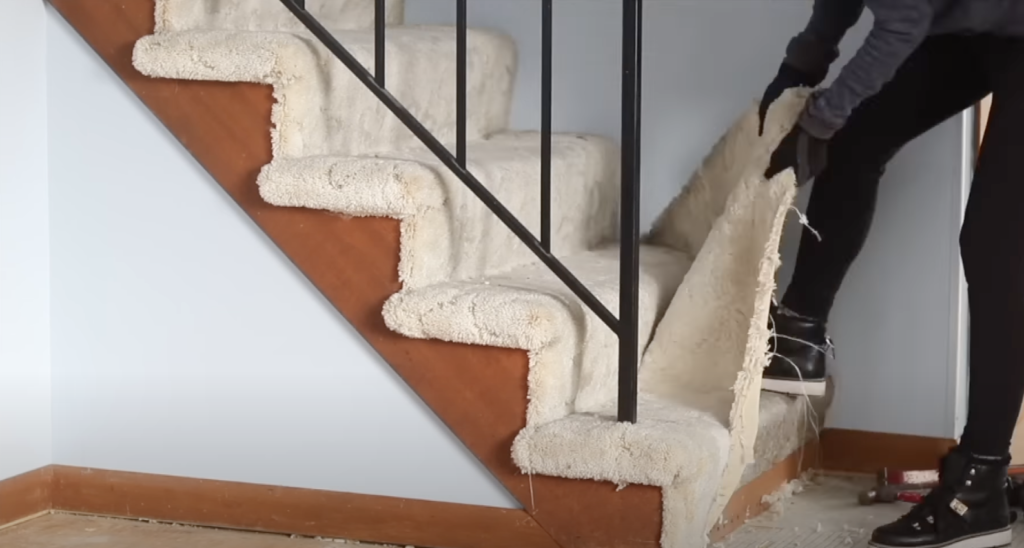
Removal and Prep
The first project in this living room makeover was to remove the crusty dusty carpet from the floor and stairs. I patched and painted the stair risers right away just to make them look a bit better before moving on. To prepare the walls and ceilings for painting, I removed and labeled baseboards and scraped the popcorn texture off the ceilings. I patched, cleaned, and primed the dirty walls. Then covered and taped everything I didn’t want my paint sprayer to get.
Painting and Beam Prep
I used my Graco Magnum X7 airless sprayer to apply paint to the walls. It was so easy I only needed one coat because I used the Behr Marquee line in the color French Beige. After the paint dried, I put Frogtape and plastic up, then used my paint sprayer again for the ceiling. It wasn’t as scary spraying a ceiling as I thought it would be and went so fast!

My extravagant plans for the ceiling required me to add height to the bulkhead that went over the hallway and stairs. The bulkhead was not low enough to match up with the depth of the beams I wanted to build. This led me to add lumber screwed into the studs and mesh tape over the seams. After coating the whole addition in several layers of joint compound, priming, and painting, you’d never know it was modified!
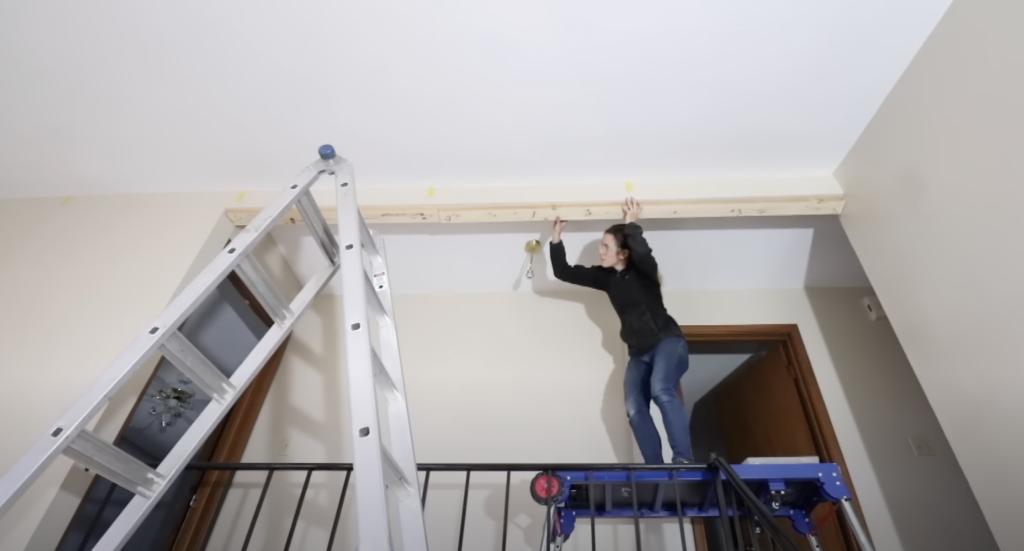
Living Room Beams
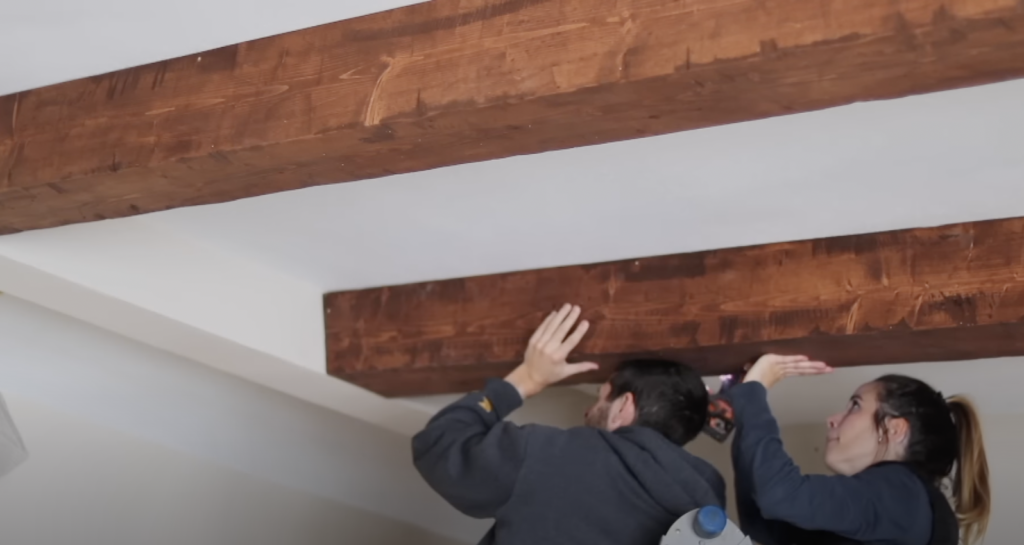
I moved on to building the beams after I completely prepped and painted the ceiling! Using 16 ft long pieces of grade 2 pine, I cut beveled edges lengthwise on my table saw. I assembled them using packaging tape and wood glue. To get the perfect long beveled edges looking distressed, I came in with some power tools to beat these beams up. Once distressed and sanded, I used a custom mix stain of Chestnut and American Walnut to bring life the beams. For beam installation, I planned out my wood supports with a laser level and put blocks in the ceiling, then screwed the beams in.
Flooring Install
Next up was to install the flooring. I cleaned and prepped the subfloor for the new flooring! The flooring I used was the Mohawk RevWood Select waterproof laminate in the color fawn chestnut. I removed the railing and gave it a fresh coat of paint after the flooring was completely in. I installed the laminate treads to the stairs and reinstalled the baseboards which I had sanded, re-stained, and resealed while they were off. That was a lot of work!

Living Room Fireplace Build
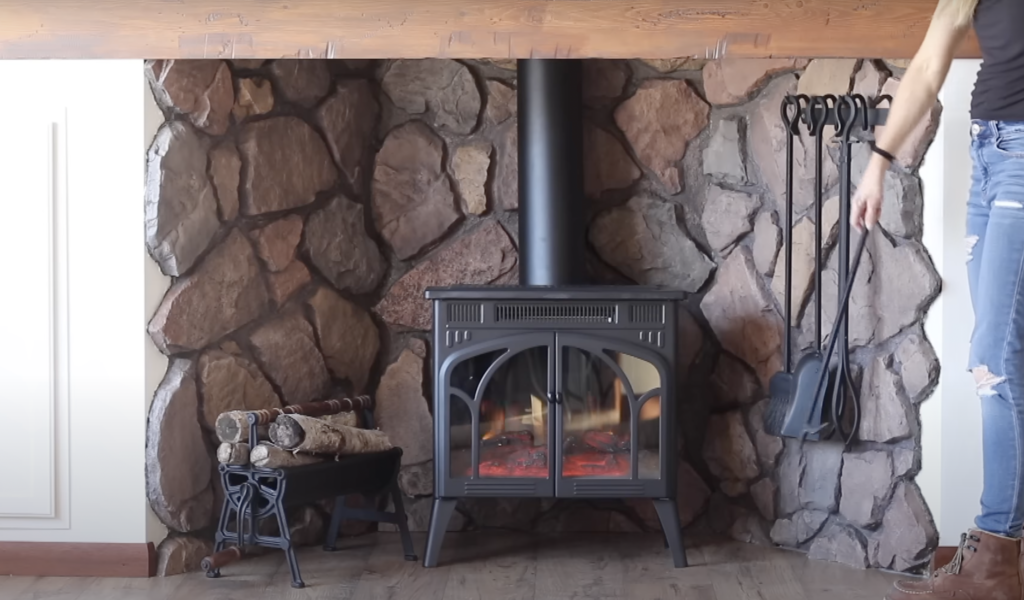
To build the fireplace focal point for my living room I started framing up walls that would hold prefab cabinets in them. I measured out my faux rock panels as the determining dimensions for how I wanted the slanted wall to look. This left me with a 32-degree angle to cut and install my slanted walls and create this custom fireplace surround. The faux rock panels were my favorite part and brought so much texture and style to the space. For the fireplace I chose a stove-style electric fireplace so I didn’t need to add venting. I included details like firewood, pokers, and a piece of pipe to make it look more realistic and charming.
Front Door Fix
Before the last step of furniture installation, I installed the new front door. I picked up this insulated metal front door on clearance because it had a few dents and fix it with this SteelStick product. I sanded it flush, primed it, and painted it once the putty was dry! You would never know there was a blemish there after the process was done!

Complete Living Room Makeover
I can’t believe it’s the same space as before.
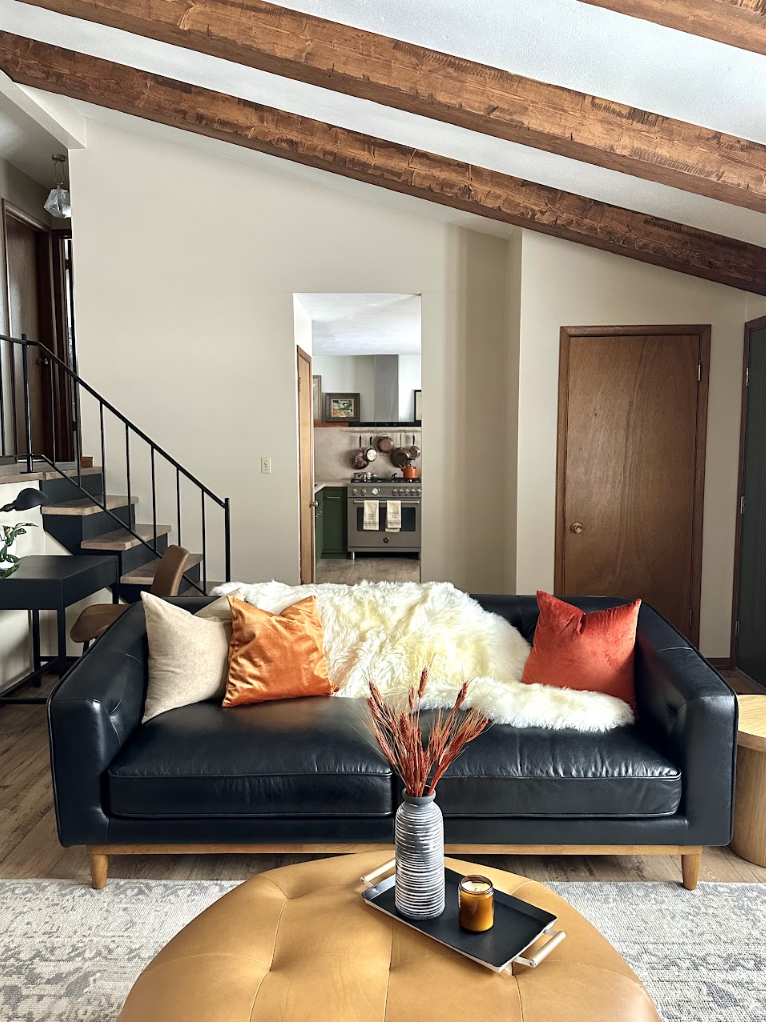
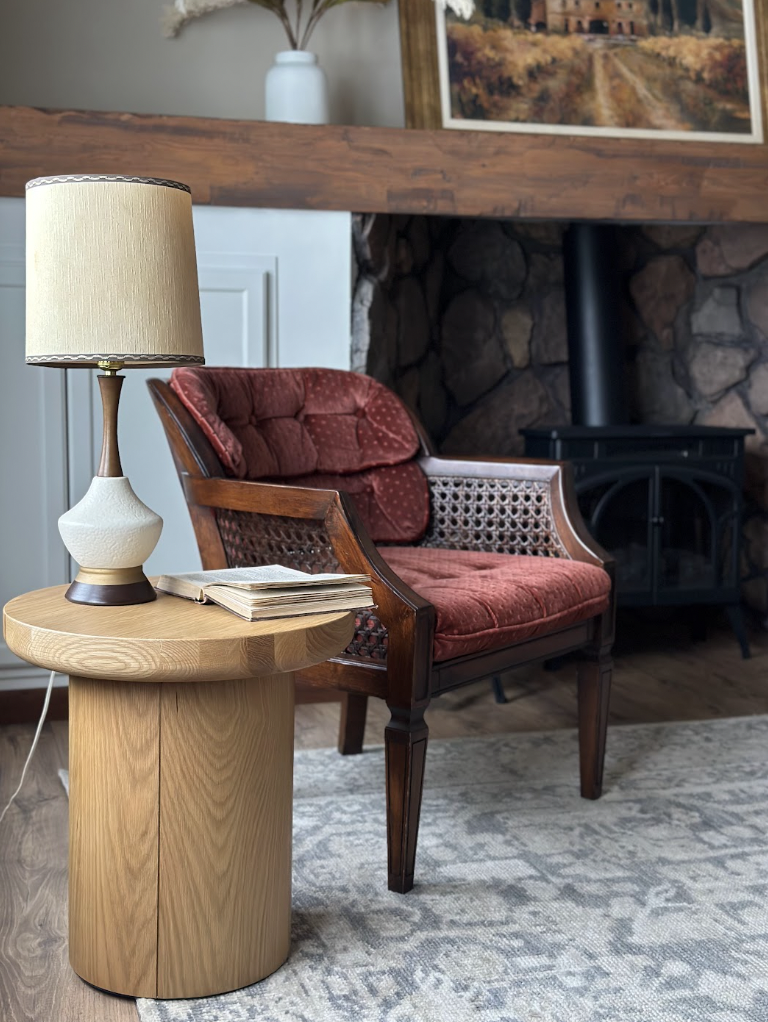
This large living room comes to life with the fireplace, beams and Article’s gorgeous furniture levels it up even more. I chose the Hamber Oxford Black Sofa and Timpani Charme Ottoman that have tufting to speak to the vintage chairs I have flanking the fireplace. The two Baarlo Side Tables are heavy-duty and solid oak.
My living room design is all grounded by Article’s Nabilu Rug which brings comfort and dimension to the space. I had so much fun designing this room to flow with how the kitchen looks now! I hope you love this living room makeover as much as I do!
If you loved this room transformation and want to see more, start on my bedroom makeover!