Painting Exterior Siding
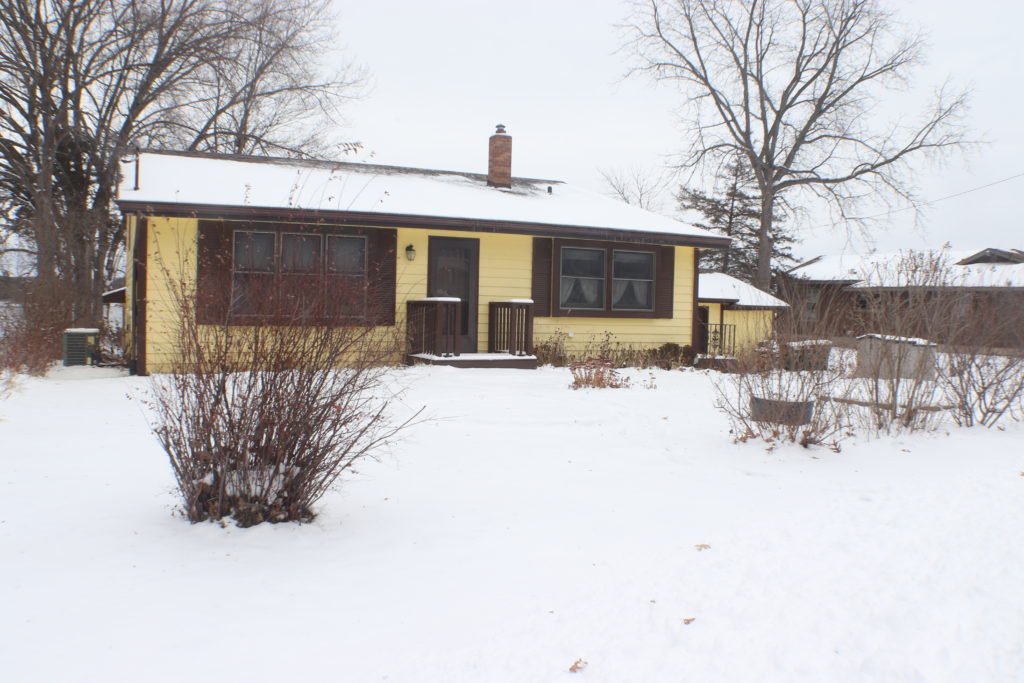
Ever since we bought this house, I have been wanting to change the siding color from yellow to something more neutral and modern. Previously, we had to sand all of the areas where the paint was peeling off. In this post, I’ll be painting exterior siding using paint and primer by Behr!
This post may contain affiliate links or sponsored content. For full disclosures and practices, please visit my policy page.
Table of Contents
Preparations for Painting
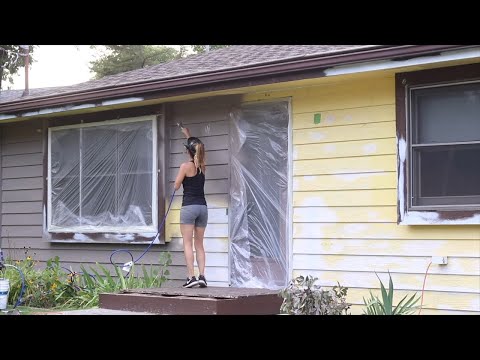
Before I began painting, I started by taking down the shutters, which was very simple just removing a few screws. I thought the railings were visually heavy on the front of the house so I got rid of those too. The railing had ripped off part of the siding, so I tried blending it with a wire bristle brush. For the leftover holes, I filled them with wood filler, and caulked several areas of the siding. To finalize preparations, I used my random orbital sander to give it a light scuff and pressure-washed the siding.
The more preparation you do beforehand, the better your paint job will turn out! Filling blemishes, sanding so the paint adheres better, and washing the siding to get it clean are all super important steps. Before the next steps, I let the wood dry completely for a couple warm days.
Priming and Painting Exterior Siding
After prepping the siding, I started by priming the areas that were totally raw wood. For this, I used the Multi-Surface Primer from Behr which I really trust. It can also go on metal or masonry and so I used this for the foundation as well.
The painting could finally begin after the primer was fully dried. I used a sprayer for the first time ever! This was a faster and more efficient application method for me. The paint I used was Behr’s Marquee Exterior Satin Enamel in the color Smoky Trout. It reads gray-brown, but also has an undertone of green. This advanced stain-blocking paint is specifically made to resist dirt and fading, perfect for siding! I’m obsessed with this product because only one coat is needed; I was able to cover the bright yellow with less product and taking less time. This paint also comes with a lifetime limited warranty!
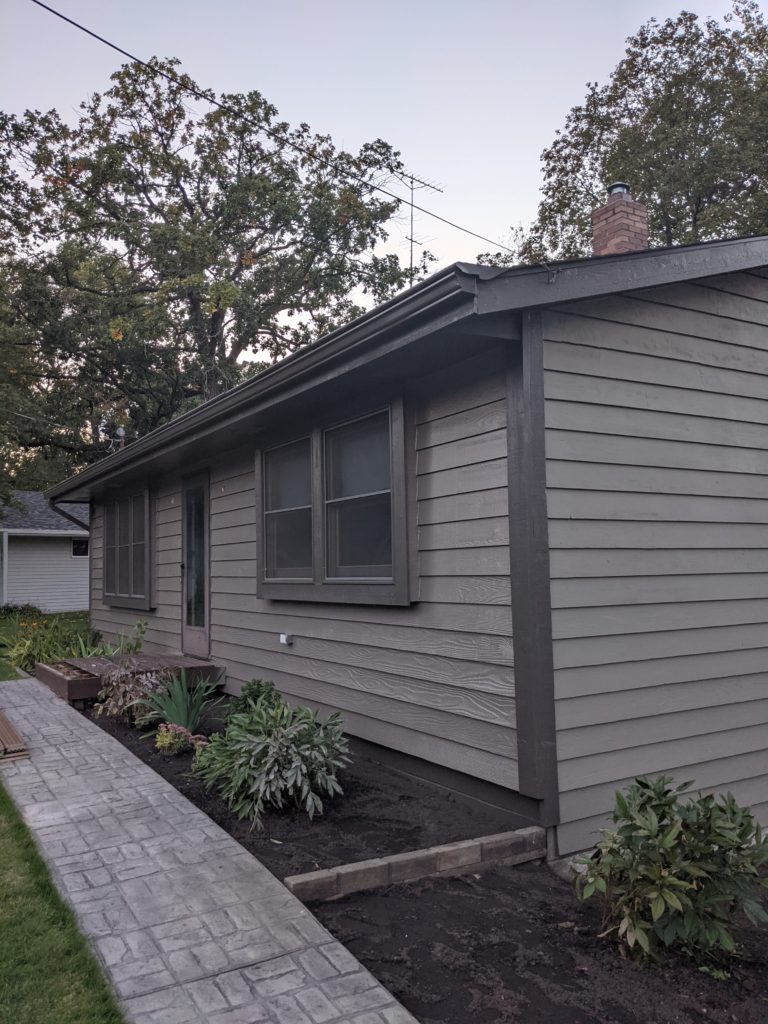
Spraying paint turned out to be fun AND easier than I thought. I can’t believe how fast I could work, I got half the house done in only one day! I used painter’s plastic and masking tape to cover each obstacle like windows and doors as I went. I also came with a brush every five to ten minutes after spraying to check for drips. I found that by using a sprayer, it was ten to maybe twenty times faster than if I had brushed and rolled the siding. For the trim, I used the same Behr Marquee Exterior Satin paint but in the color Peppery, which is like a dark gray-brown.
The After Result!
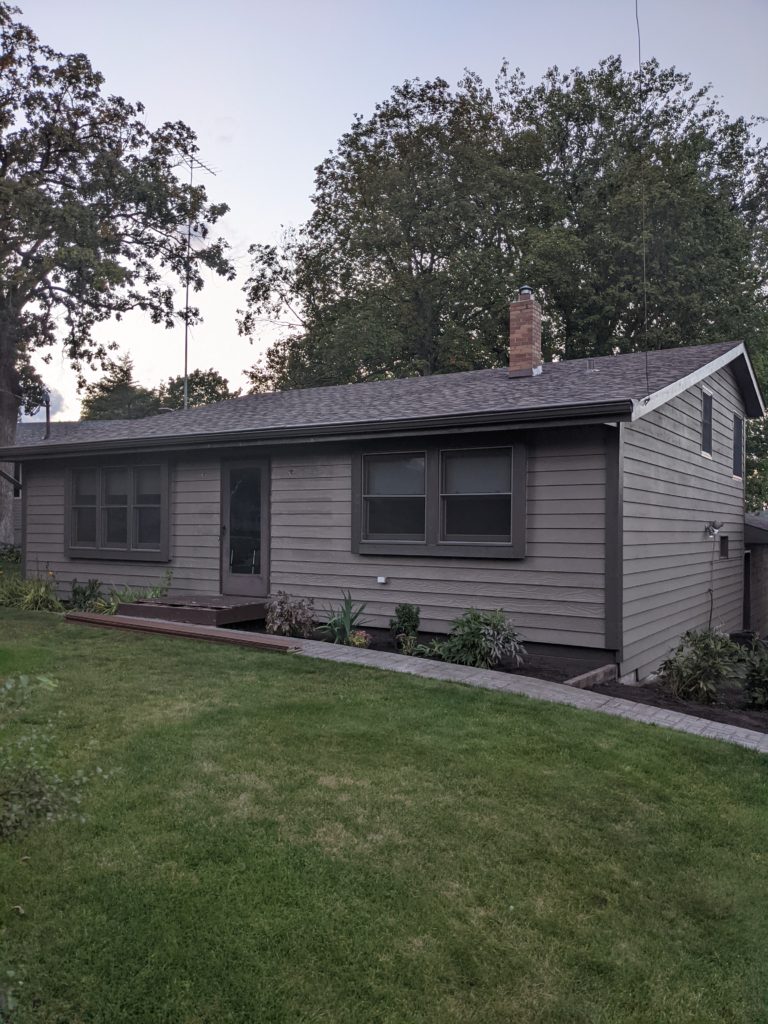
I love the new siding and trim colors together. It is definitely a lot darker, but it’s also much more modern. Both applied beautifully in only one coat. This house was so yellow it was the talk of the neighborhood. Now that we’ve updated it, our neighbors can’t stop gushing! As you can see, the front entrance still needs a lot of love. I’m going to add some new accent lights, a new front door, and replace decking on the front step to bring this house more alive! I couldn’t have transformed this house without Behr paint and I’m so thankful to them for sponsoring this post! If you want to check out more of my outdoor projects, Building a Retaining Wall in One Day is a great place to start!