DIY Small Kitchen Makeover
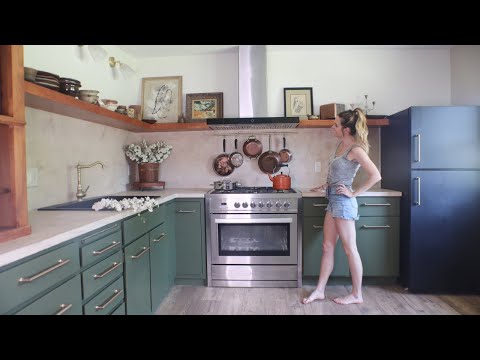
I am very excited to reveal my small kitchen makeover! Over the last five months I have been working on the kitchen in the lakehouse I purchased. This project was such a huge undertaking and I am so proud to have done it almost entirely myself!
This post may contain affiliate links or sponsored content. For full disclosures and practices, please visit my policy page.
Table of Contents
- Demolition
- Creating a Breakfast Nook
- Refinishing Painted Cabinets
- Installing New Flooring
- DIY Floating Shelves
- New Countertops
- Hutch Upcycle
- Installations and Final Results
Demolition
I sold all the appliances that were in the kitchen and I cleaned out the cabinets. I took down the cabinets very carefully because I wanted to try to convert them into a breakfast bench. I also removed four layers of flooring. They needed to be low enough so the laminate I placed wouldn’t interfere with door thresholds. I also removed the sink and the countertops since I was going to reconfigure the entire kitchen.
There was a doorway that came off the side of the kitchen that I decided to remove. I was able to successfully remove it and put a wall up so I could increase the size of the kitchen. By removing this doorway, I gained a lot more wall space for cabinetry and the fridge.
I removed the popcorn ceilings as well by scraping the texture. Then I applied a texture medium over it from modern masters. It gave it this hand-troweled plaster look which I loved!
Breakfast Nook Makeover
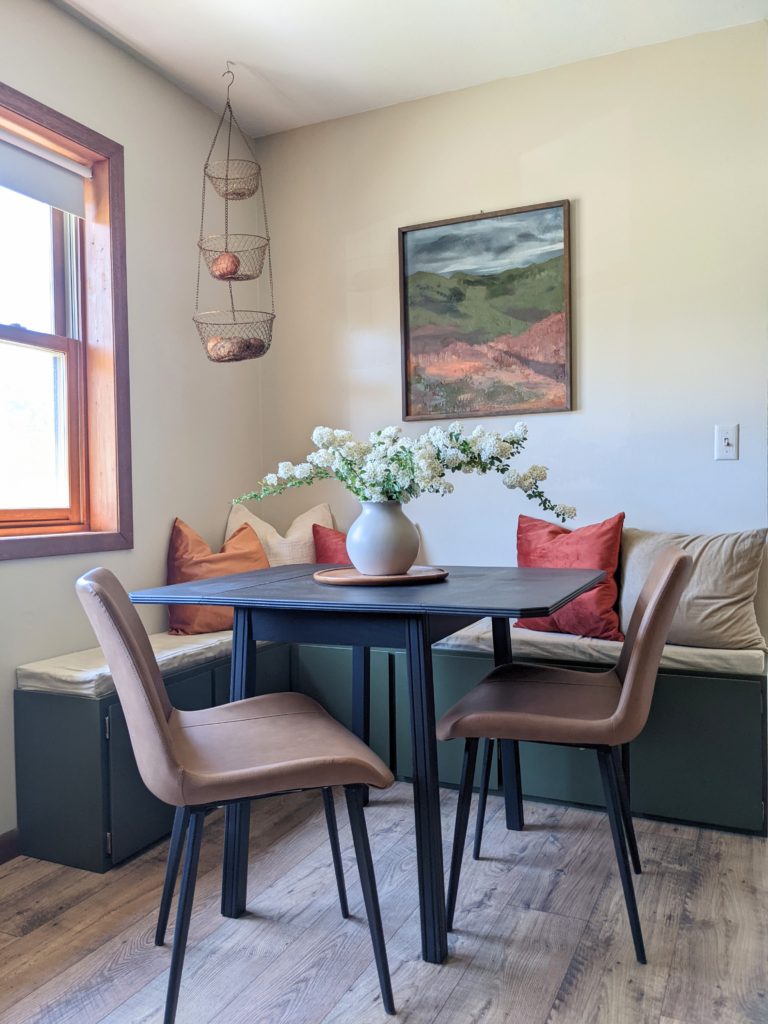
The first project that I underwent was to turn those upper cabinets into a banquette bench. I completely refinished and modified them so they would fit together in an L-shape. I think this up-cycle gives hidden storage and charming seating that works well in the corner of this room.
Refinishing Painted Kitchen Cabinets
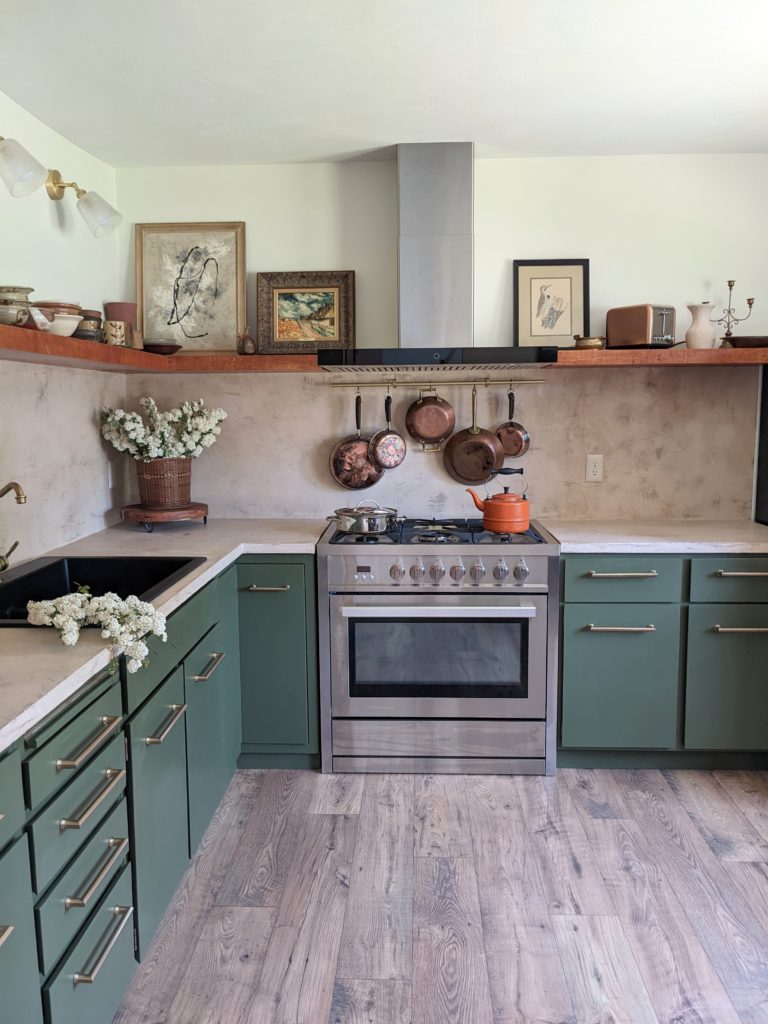
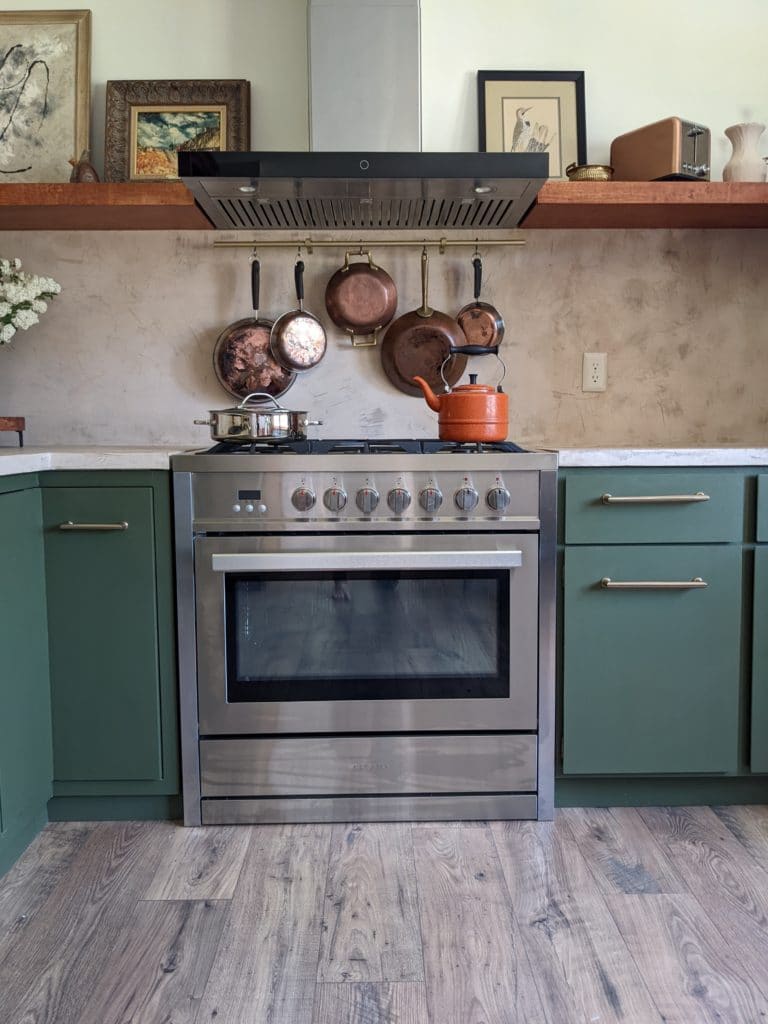
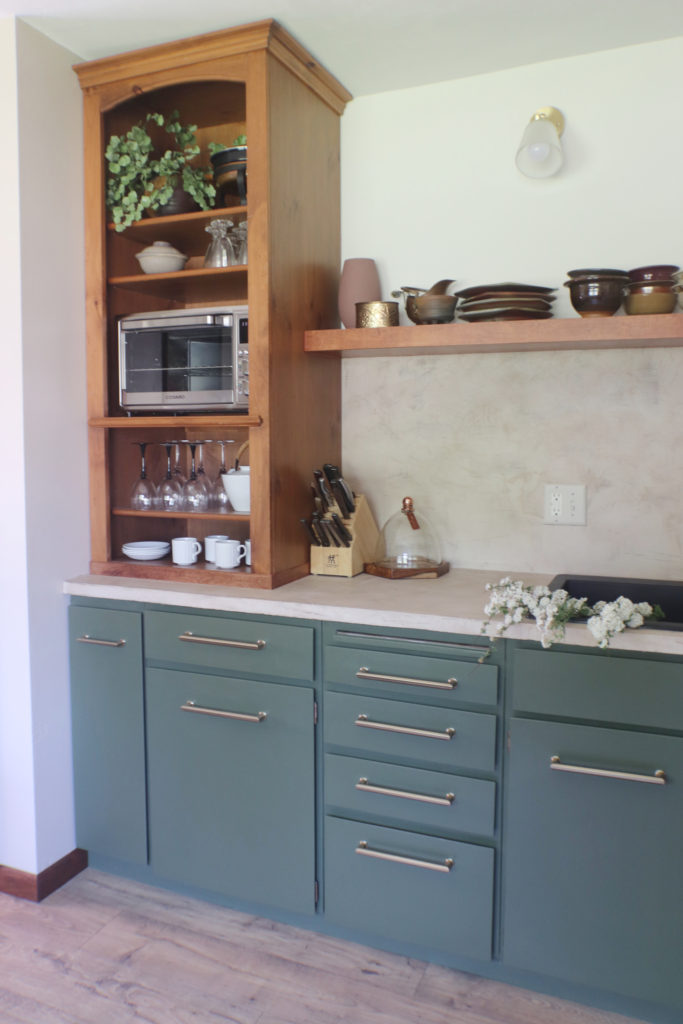
Next, I painted the walls and continued repainting and refinishing the cabinetry. This took a while because I had to remove all the old paint, take off the trim detail, and sand the fronts to bare wood. I rearranged the cabinets that I had and added one prefabricated 36-inch cabinet modified to look like the rest. I also built a custom pan rack where I had this weird space left over. The hardware is called the Facette Pull from Belwith Keeler and it totally made the look of this kitchen!
Installing Waterproof Laminate Floors
After the cabinets were in I was able to lay flooring. The waterproof laminate flooring we chose was the Mohawk RevWood Select in the color Fawn Chestnut. This product was easy to DIY install because of its click-together style. At this point the kitchen was starting to come together, but I still had many more ideas up my sleeve!
DIY Floating Shelves
Next, I built a floating shelf that had hidden brackets behind the drywall. I cut out the drywall and put the brackets in alternating onto the studs. Next, I patched it and then built the shelves out of one sheet of three-quarter-inch cabinet grade maple plywood.
Countertops
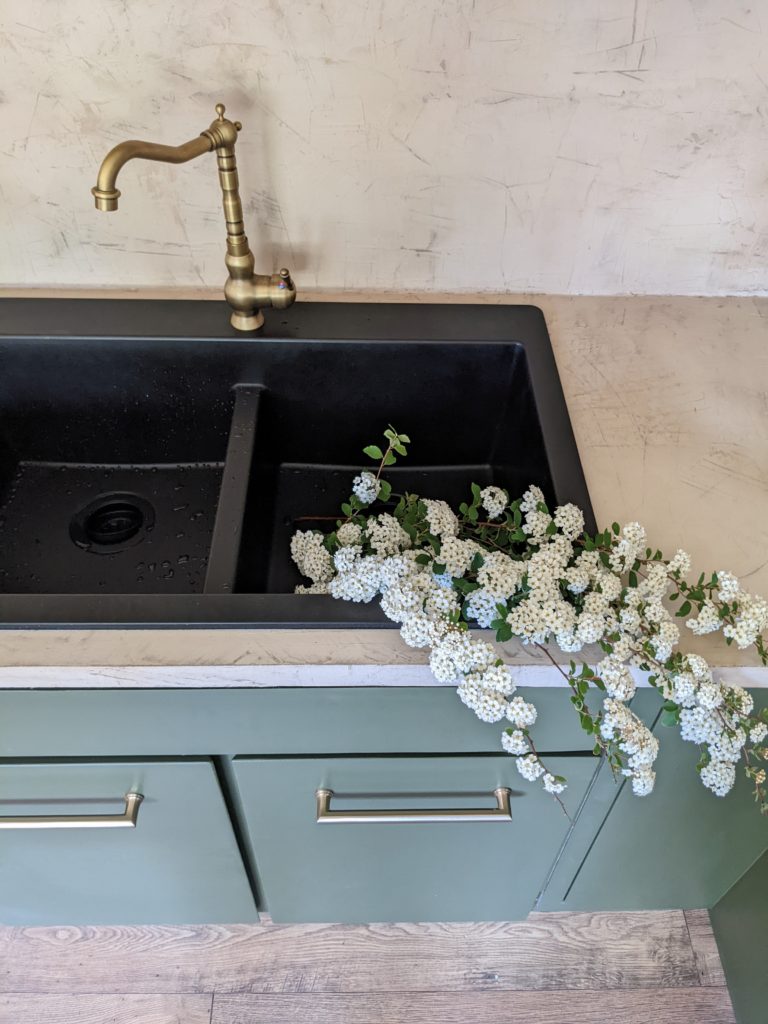
For the countertops in this small kitchen makeover, I worked with diyconcrete.com to fabricate countertops out of concrete. You create forms out of foam rails attached to melamine sheets, pour the specialty concrete into the forms, then flip them just like a stone onto the cabinets. I covered them with a MicroTek concrete topping that gave the entire backsplash and countertop the look of concrete. The color and textured look give so much movement to the kitchen.
Hutch Upcycle
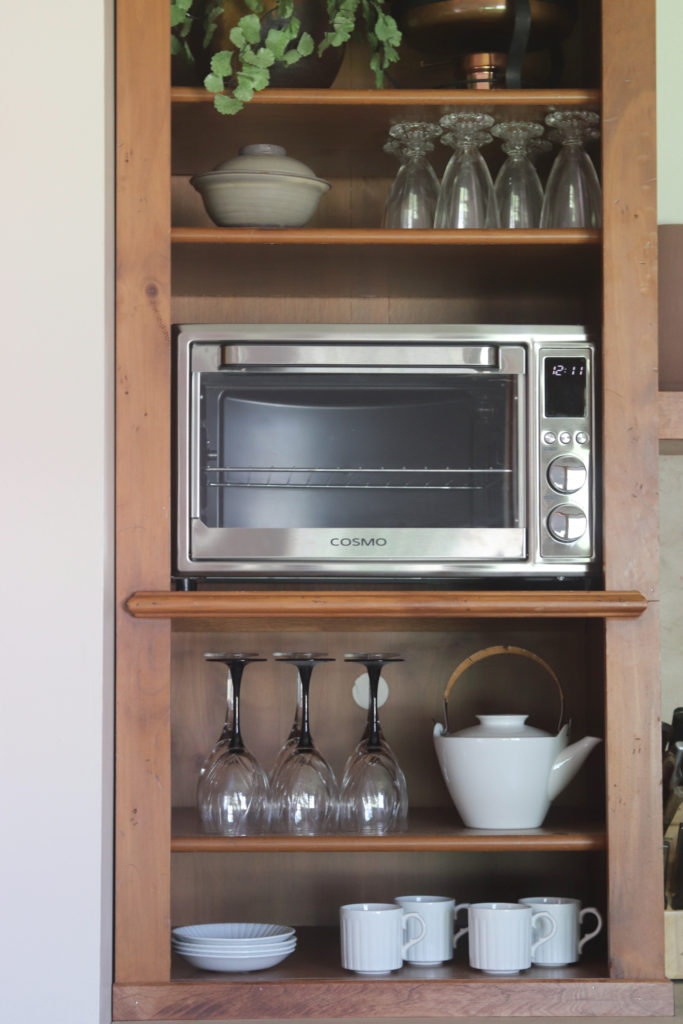
After I completed the concrete counters, I put the hutch in place. This hutch was originally the living room bookshelf that was left in the house. I cut it down to fit in the kitchen and cut out a hole for an outlet to fit. I added trim to make it look more natural in the corner and it turned out beautiful!
Kitchen Makeover Installation
Once my building was all done I went ahead with installing all the things to make this a functional kitchen. I installed a sink and faucet with a drop-in style sink to protect the concrete counters better. I also installed the range hood with some help from my electrician. Next, I installed lights over the floating shelves to give the kitchen a gallery feel. The last DIY project I had was to fix up my old fridge. I fixed the dents and filled holes where the old handles were with JB Weld Steelstik. I removed the logo and the handles on the fridge to make it look more new. I sanded down the whole fridge and painted it with this urethane enamel paint from Behr that’s actually meant for metal.
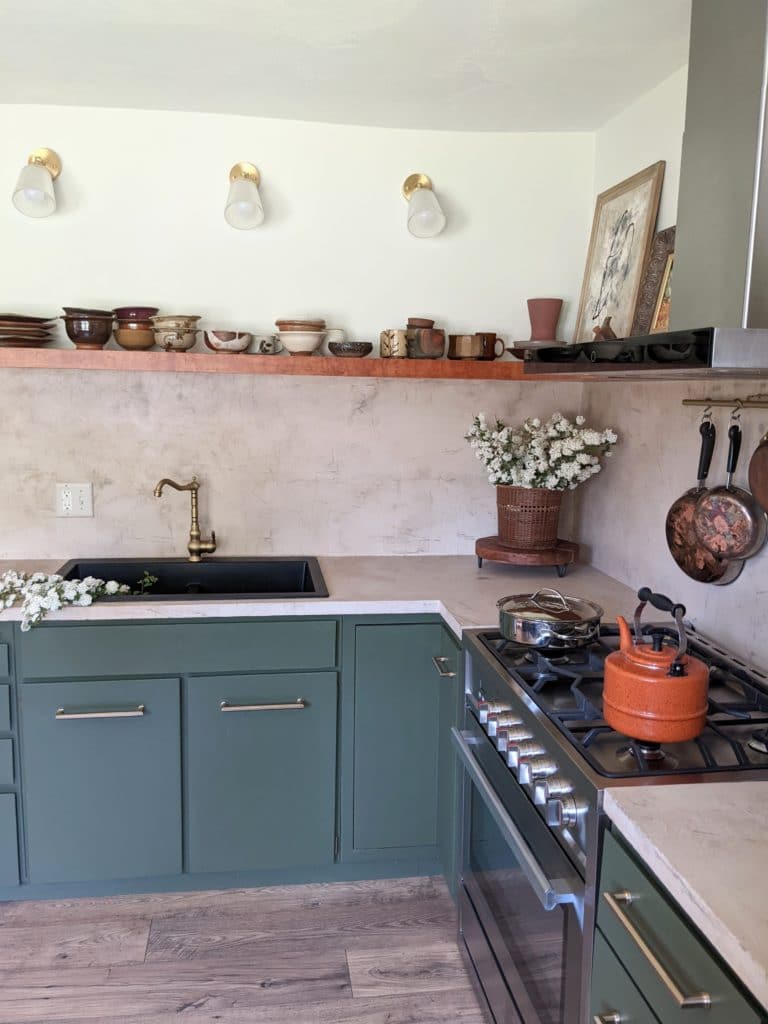
Cosmo Appliances also sent us a beautiful dual fuel range that works amazing. It has an electric oven and a powerful gas stovetop that makes cooking fun and easy. Cosmo also sponsored a super functional little toaster oven that fits perfectly in the hutch. It can do all the things – convection, rotisserie, pizza, broil, even air fry and dehydrate!

I love how this DIY small kitchen makeover turned out! This process took months to complete but it was so worth it! I hope you watch the video to get a better sense of all the work that went into this space and what it looked like before. What do you think about the end result?