Refinishing my Painted Kitchen Cabinets
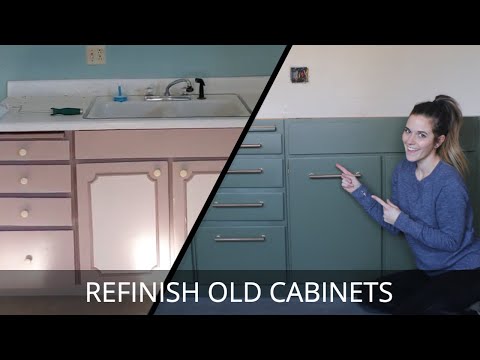
The next step of my lake house kitchen makeover is refinishing the kitchen cabinets. The old paint job was so full of imperfections and heavy drips! If I wanted to reuse the same cabinets I had to completely remove the paint to get a smooth finish.
This post may contain affiliate links or sponsored content. For full disclosures and practices, please visit my policy page.
Table of Contents
- Breakfast Nook
- Removing the Old Paint Job
- Painting Cabinetry
- Putting It Back Together
- The Finished Product
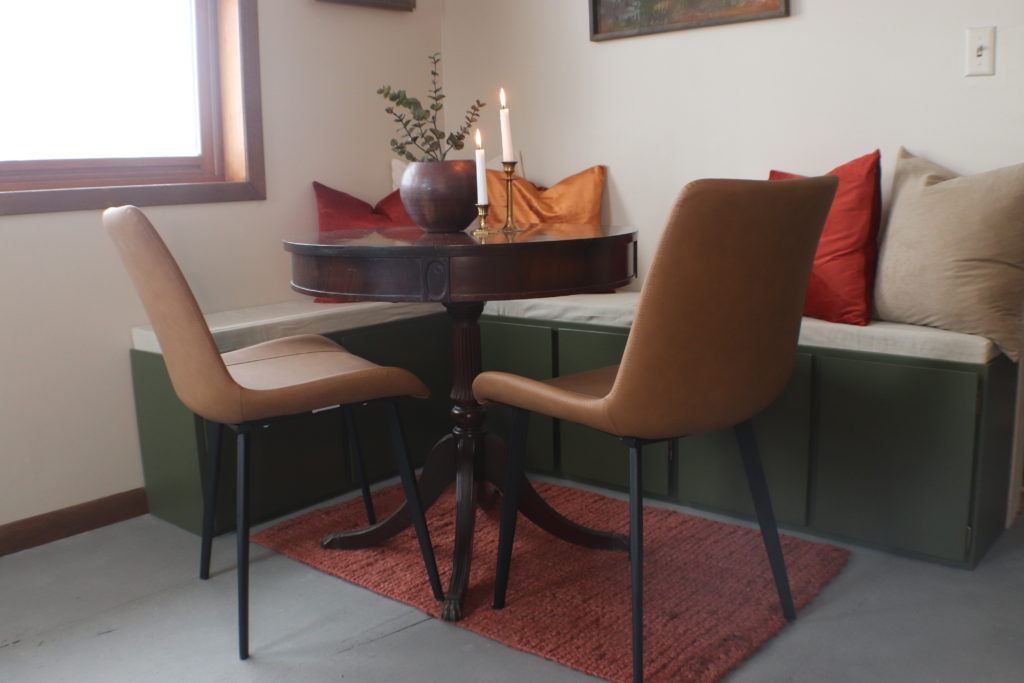
Breakfast Nook
I started by taking down all of my uppers and tried to save and reuse them as much as possible. As you saw in my previous post, I used the upper cabinets for a breakfast bench, which turned out great.
Removing the Old Paint Job
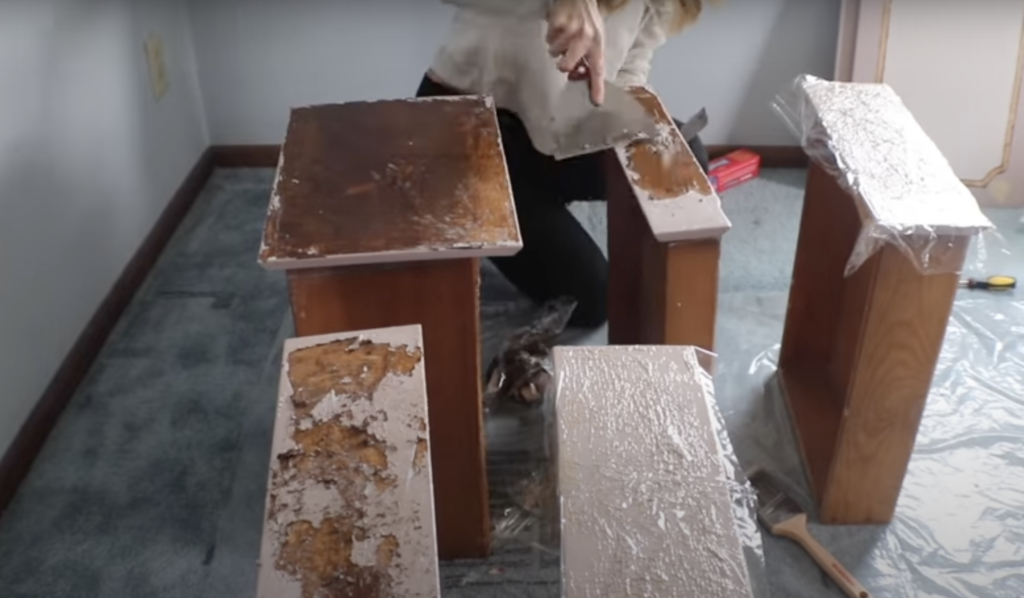
Since I am replacing the counters, I removed the old ones and that allowed me to remove the cabinets off the wall. The sanding process to remove the old paint was long and tedious! I made sure to remove all of the hardware, latches, knobs, and trim off of every door. To remove the paint from the boxes, I used a belt sander, since it’s probably the fastest method to remove the paint job. On the drawer fronts, I decided to strip them because the belt sander would’ve been hard on the wood joints. I added a 15-minute stripper to them and put plastic wrap over it to keep the product wet longer so it works better. I used my random orbital sander on the drawer fronts after I stripped them. I then repaired and blemishes and filled any holes on the drawer fronts with wood putty.
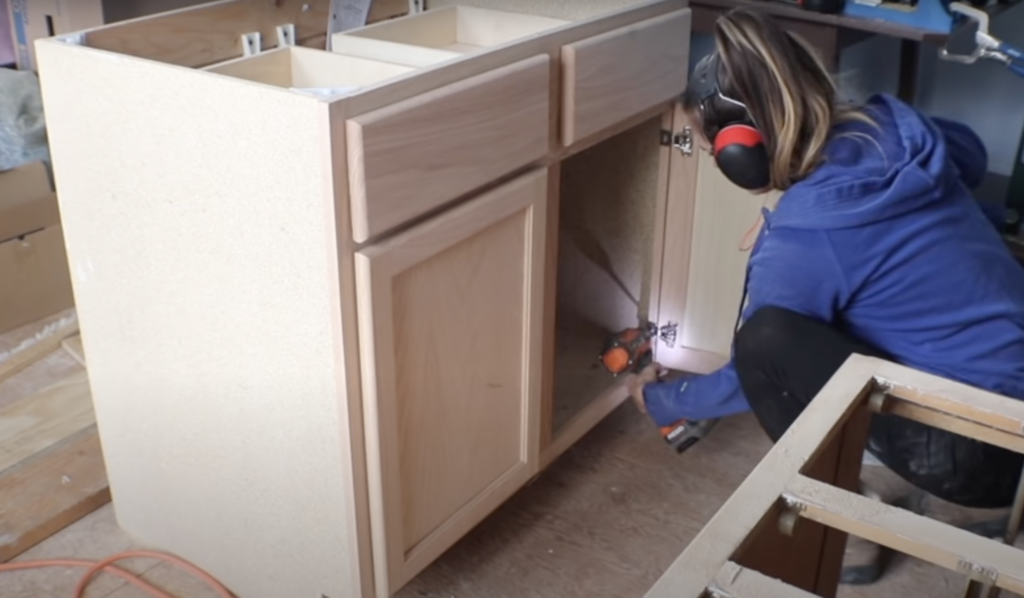
With my new kitchen layout, I did have to purchase one stock cabinet so I could put it between the stove and the fridge. Its door fronts were different from the others. To fix this, I removed them and added the leftover cabinet doors from the uppers to make the doors have the same appearance as the old cabinets. Since this stock cabinet would be exposed on both sides, I put hardboard on either side to have a smooth appearance. I used a jigsaw to cut the correct dimensions and I used my nailer to attach it to the cabinet.
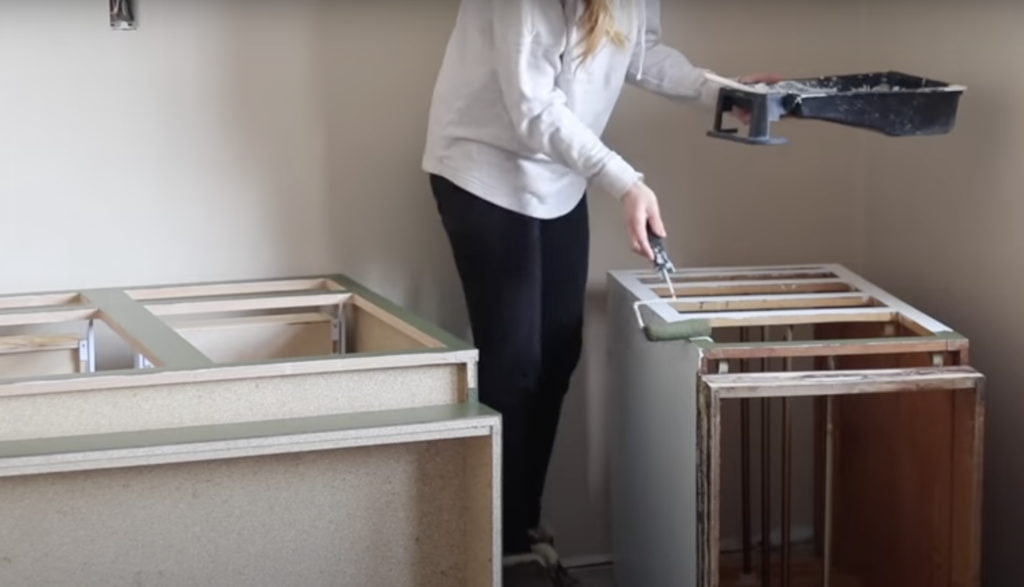
Painting the Cabinetry
I sanded every surface, then added primer, resanded everything again, and then painted. The color I used for all of my cabinets was Olive, by Behr Paint. I was really nervous to do this non-neutral color of paint, but I ended up loving how the color turned out. I definitely prefer to use a roller to paint instead of spray, but it is a tedious job to do. You have to be very careful and make sure there are no drips. The paint I chose was enamel so it is very durable and perfect for cabinetry. This allowed me to not have to add a poly layer and made refinishing my kitchen cabinets easier.
Putting it Back Together
After about two days, when the paint had fully dried, I drilled some holes to add my hardware. I used the Facette Pull by Belwith Keeler. To install these I used a hardware jig to center the holes and have them perfectly spaced. I was thrilled with how the stock cabinet was transformed! The drawers and the doors looked like the other cabinets in the room. When reassembling the cabinets, each was drilled back into the studs. I found each stud using the magnetic stud finder. After this, to make sure everything was secure I screwed the cabinets to each other.

With reusing my cabinets, my run of cabinets had this awkward space at the end so I had to come up with something creative. I created an L shape with wood and screwed it into the wall and made sure it was level for the countertop to be added on top. Initially, I was going to make this space garbage bin pull out however the space was so small that I couldn’t find a garbage bin skinny enough.

I decided to instead add little grooves in the wood called dados with the table saw so I could later add slits of wood into them to separate them. I added wood glue in each of the dados and added plywood that I cut to size to add to them. This became a perfect roll-out drawer to store cutting boards, baking pans, and other materials. There was a little gap between this new pullout drawer and the cabinet right next to it. To fix this I added a thin strip of wood to hide the gap.
The Finished Product of Refinishing my Kitchen Cabinets
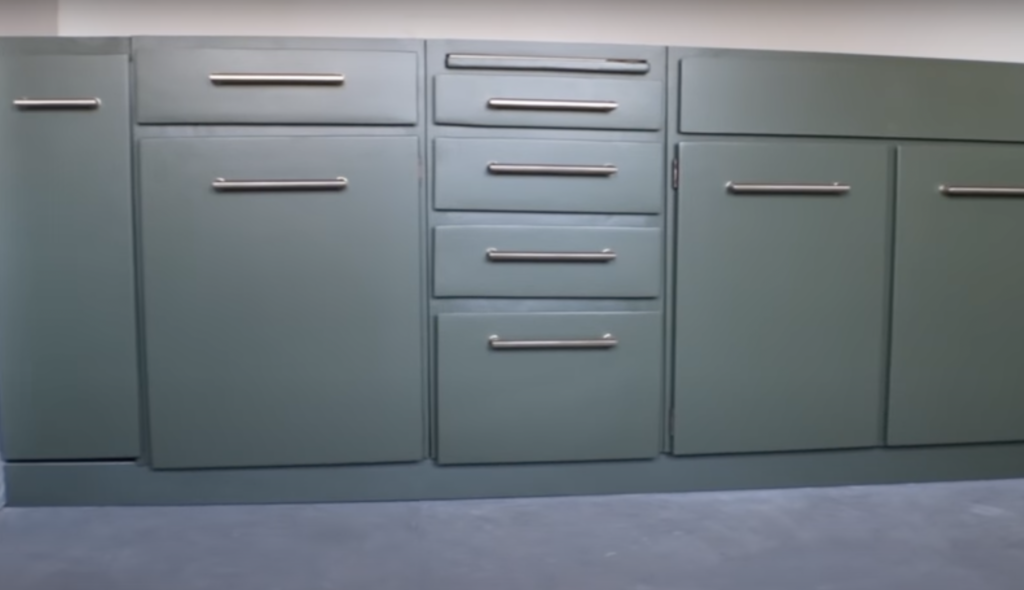
The last part of refinishing my kitchen cabinets was to add the toe kick baseboard underneath all of the cabinets. I am so happy with how this turned out. The paint job is beautiful and the new champagne bronze hardware on the cabinets makes this kitchen look modern. This project took me 3 weeks and was a lot of work, but so worth it! What do you think of the new cabinet color?
If you want to see how I completed the rest of this kitchen, read the DIY small kitchen makeover post!