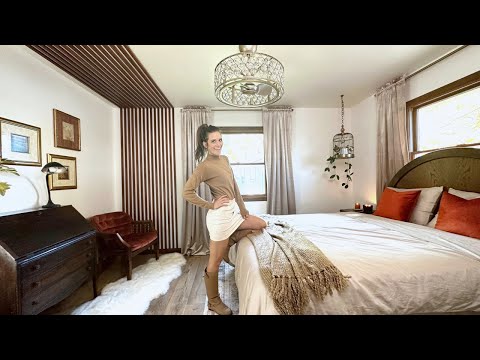
Bedroom Makeover
The lakehouse I have been renovating had an outdated and boring bedroom. Not only this, but the room was all blue, the carpet smelled terrible, and an inch of dust covered the entire room. I have been working on a bedroom makeover for the past month to make it more warm and cozy.
This post may contain affiliate links or sponsored content. For full disclosures and practices, please visit my policy page.
Table of Contents
- Demolition
- Painting
- Adding New Flooring
- The Inspiration for this Bedroom
- Slat Wall Installation
- Final Touches and Final Reveal
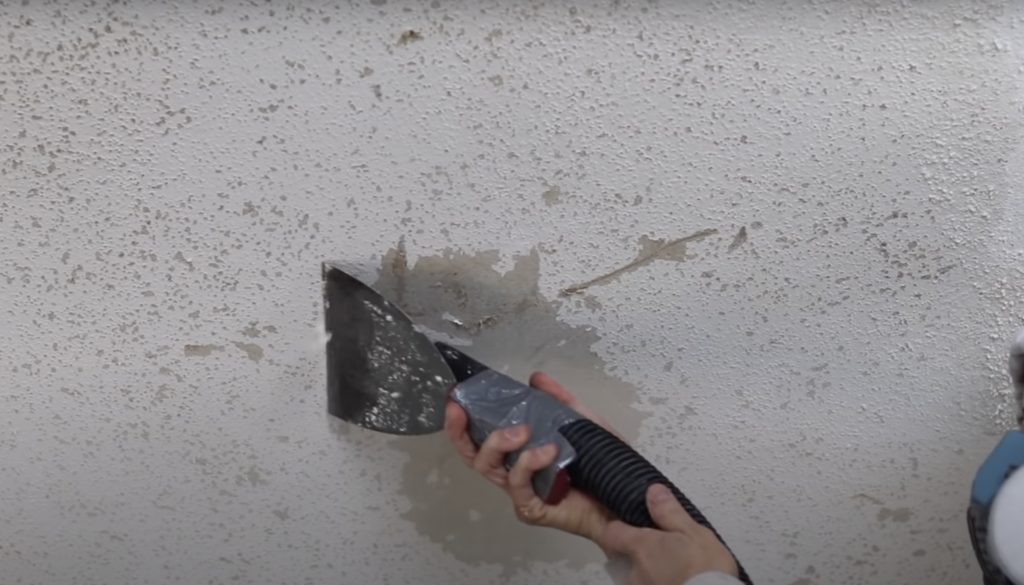
Demolition for the Bedroom Makeover
To start, I removed the carpet, staples, and tack strips that came with it. I also took the baseboards off to refinish them, this is going to make it easier for me to paint. The dusty ceiling fan came down in order to scrape the ceiling texture. I also had to scrape this “popcorn” texture off of the closet walls. To do this I spray the texture with warm water and then scrape it off with an 8-inch metal drywall knife. If you would like a more detailed explanation of how to scrape popcorn texture there is a post about it here. After all this demolition, we are left with a fresh slate to start the bedroom makeover!
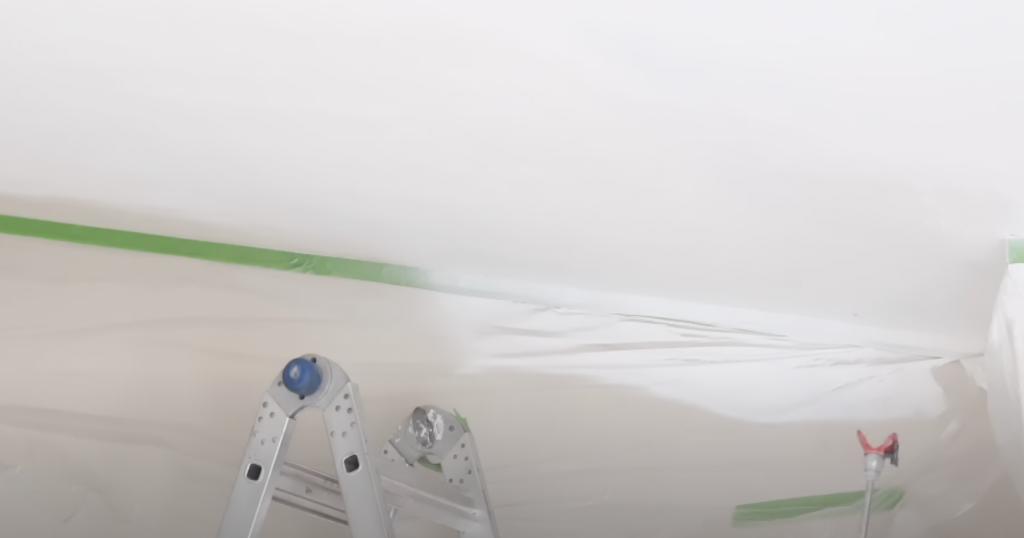
Painting the Walls
When the demolition is finished and everything is cleaned up, I begin painting. I use multiple coats of paint on the ceiling, walls, and inside the closet. I painted until everything was a beautiful warm white. One of the ways I am saving money on this project is by using leftover paint, you can get it from your local household hazardous waste site, but I have enough left over from other remodeling projects to complete this room.
Flooring for the Bedroom Makeover
For the flooring, I am using leftover flooring from other renovations in the lake house. The flooring is laminate, so it is pretty cost-effective overall. If you want a more detailed tutorial on how to lay laminate flooring click here.

Bedroom Makeover Inspiration
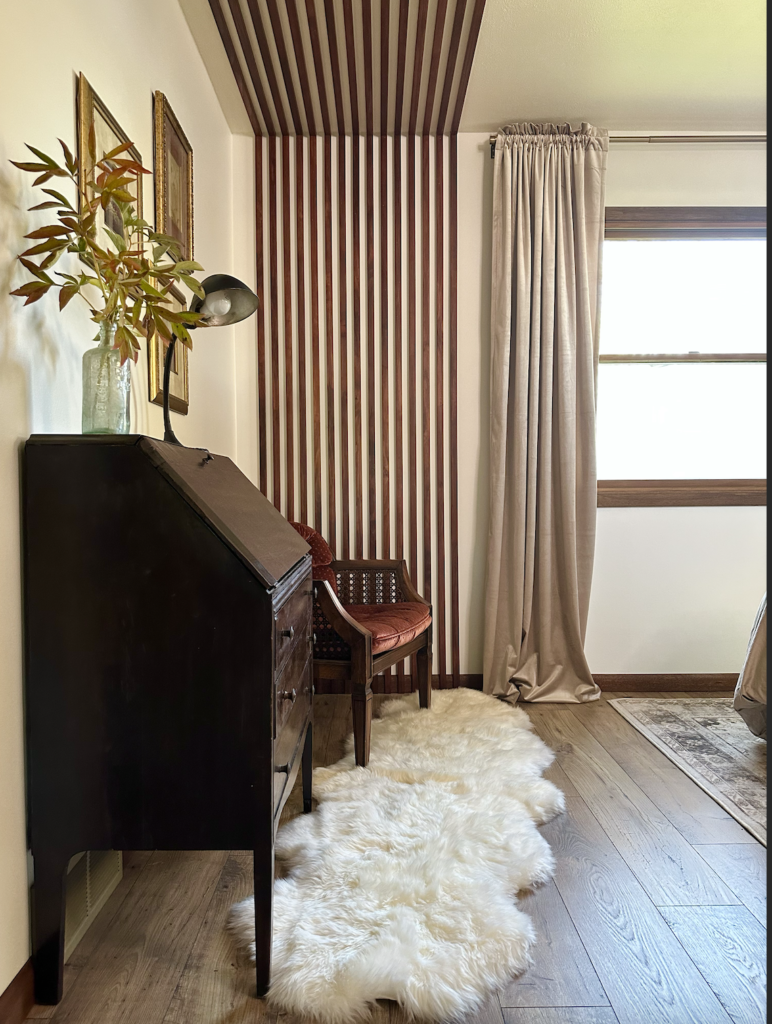
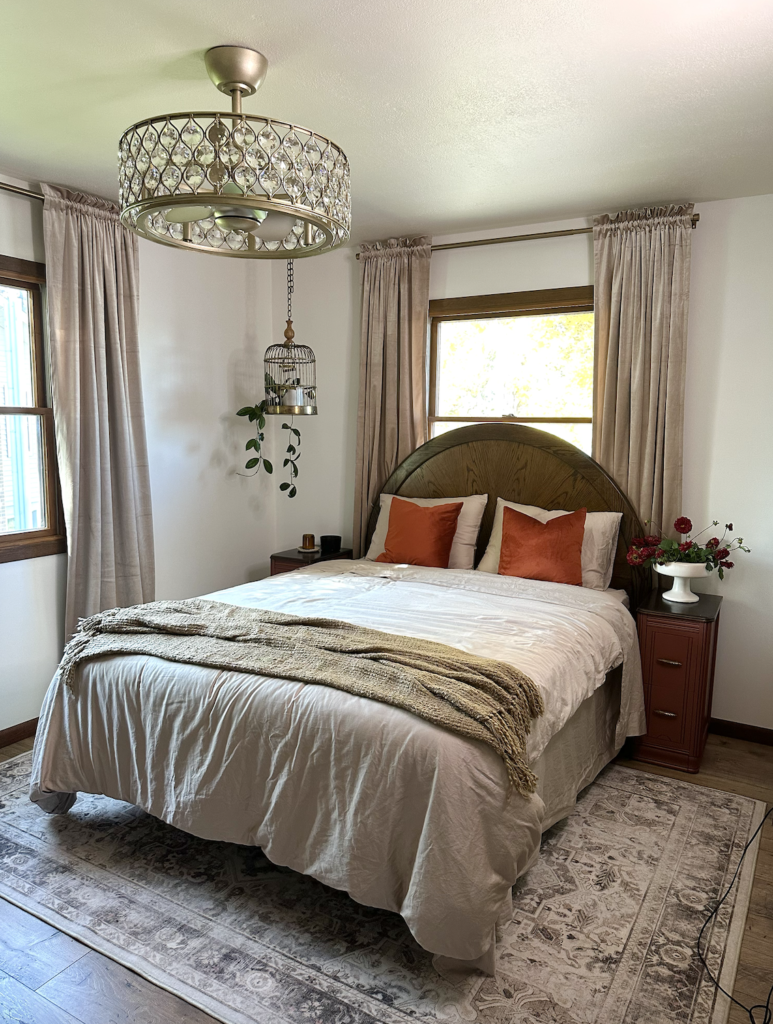
The inspiration for this bedroom makeover comes from the warm gray sheets for the bed and the antique furniture. One of the main pieces is an old wood secretary desk that I am refurbishing. I sand out blemishes, fix a broken leg and drawer slides, and match the original stain color to bring this back to life. Other furniture I am featuring in the room are two end tables. I am also refinishing these to a maroon with stained wood tops that match the antique secretary.
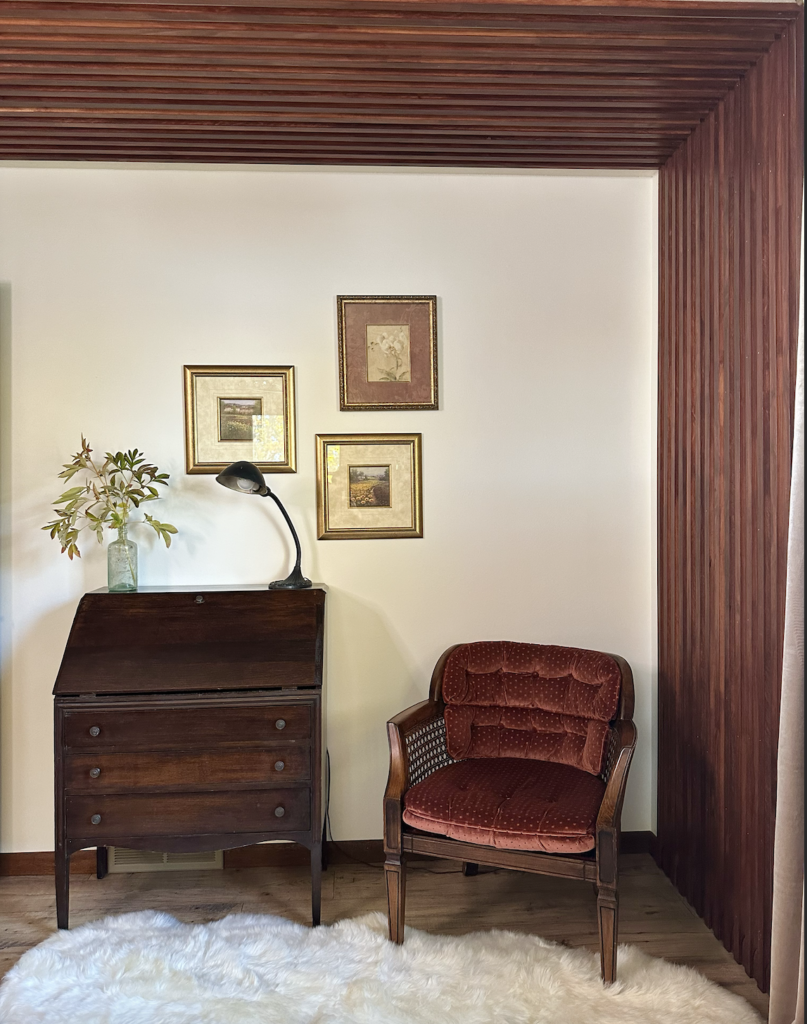
Slat Wall Mid-Century Modern Design
At this point, the walls in this room are looking pretty boring just painted white. To make them more exciting I am creating a slat wall design. This speaks to the fact the house was built in 1957 and is a mid-century home. I bought 10-foot-long and 8-foot-long 1x4s and ripped these on my table saw to a little bit wider than an inch each. Then I sand them all down, pre-condition, and stain them. I am staining them with American Walnut, which transforms pine into a walnut look alike. When the three coats of stain were dry, I put satin polyurethane over them to protect them.
Slat Wall Installation
To install the slat wall design I am using a laser level, but you can use a regular 4-foot or 6-foot level. The first slat being straight is the most important, from there you can use a spacer to build off of it. I am using a nail gun with 18 gauge brad nails about an inch and a half long shooting them in at crisscrossing angles. If you shoot your nails in straight the slats can pull right out of the drywall. My slat design goes onto the ceiling; to install these 10 foot long slats alone I put up a temporary ledge. I put one end of my slat on this ledge board then lift the other side and put my nails in.
Finishing Touches for the Bedroom Makeover
I bought and installed curtains from Amazon, they match the sheets from Brooklinen perfectly. In addition, I also decided to lay a neutral rug from Ruggable. I got a bed that matches the wood colors in the room very well, so it compliments the other furniture. The mattress I purchased is a queen-sized mattress from Amazon as well, it was very affordable! I used a lot of thrifted pieces to style this bedroom makeover including paintings and a vintage birdcage. Overall this room went from dirty and boring to warm and vintage with this bedroom makeover.
I hope you love this vintage modern bedroom makeover! This entire project took me about a month to complete and the room did a complete 180!